[ad_1]
Landscape photographers would have a much easier time if only we could move the sun to suit our whims. (We’d make sure to put it back afterward.) Alas, unless you’re an unapologetic Photoshopper – or maybe a Luminary these days – you can’t do much to change the natural light.
That’s both good and bad. On one hand, natural light can be some of the most beautiful, inspiring, and emotive light you’ll ever capture as a photographer. On the other hand, if it doesn’t look good at the moment, it almost feels like you’re stuck.
Portrait photographers can always change their flash setup if the light doesn’t look good on the first attempt. Studio photographers have almost limitless control over the light. But landscape photographers – aside from a handful who mainly photograph light painting at night – don’t have those luxuries.
Instead, there are two skills that landscape photographers must cultivate in order to capture better natural light: timing and direction. But before I show examples of timing and direction in landscape photography, let’s analyze what “good light” means in the first place.
What Is Good Light?
Good light seems like it has a pretty loose definition. Is a sunset good light? What about an intense storm rolling in? A peaceful fog in a forest?
All of these sound nice, but they’re not what I mean by good light. When I mention good light, I’m referring to light that carries the emotions you want in your photo. For example, you may be standing in front of a subject that demands very dramatic light. If it’s a gentle, pastel sunset overhead, that could actually be a negative rather than a positive.
Personally, my ideal in photography is for everything about the photo – my subject, composition, and light – to be “on the same page,” so to speak. I want them all to convey similar emotions as one another.
That’s why sometimes the best light in landscape photography is blue hour: dark, high contrast, and blue. Sometimes it’s sunset: vivid and colorful, usually with bright highlights. Other times, the best light might even be during the middle of the day with a harsh sun overhead, if that’s what works best for your subject. There’s no universal “best light,” there’s just the best light for the photo at hand.
Timing
Even though we can’t change the position or color of natural light, we can always wait around for it to change on its own. Spoiler alert: The sun moves across the sky. If the light isn’t good right now, try to figure out what conditions would allow it to look the best. Then, wait.
Sometimes it’s a matter of waiting just a few minutes for a cloud to pass in front of the sun. Other times, you may need to wait several hours or simply return another day in order to get better lighting conditions. I return to some of my favorite landscapes constantly in hopes that the light and conditions will be just right for the image I have in mind.
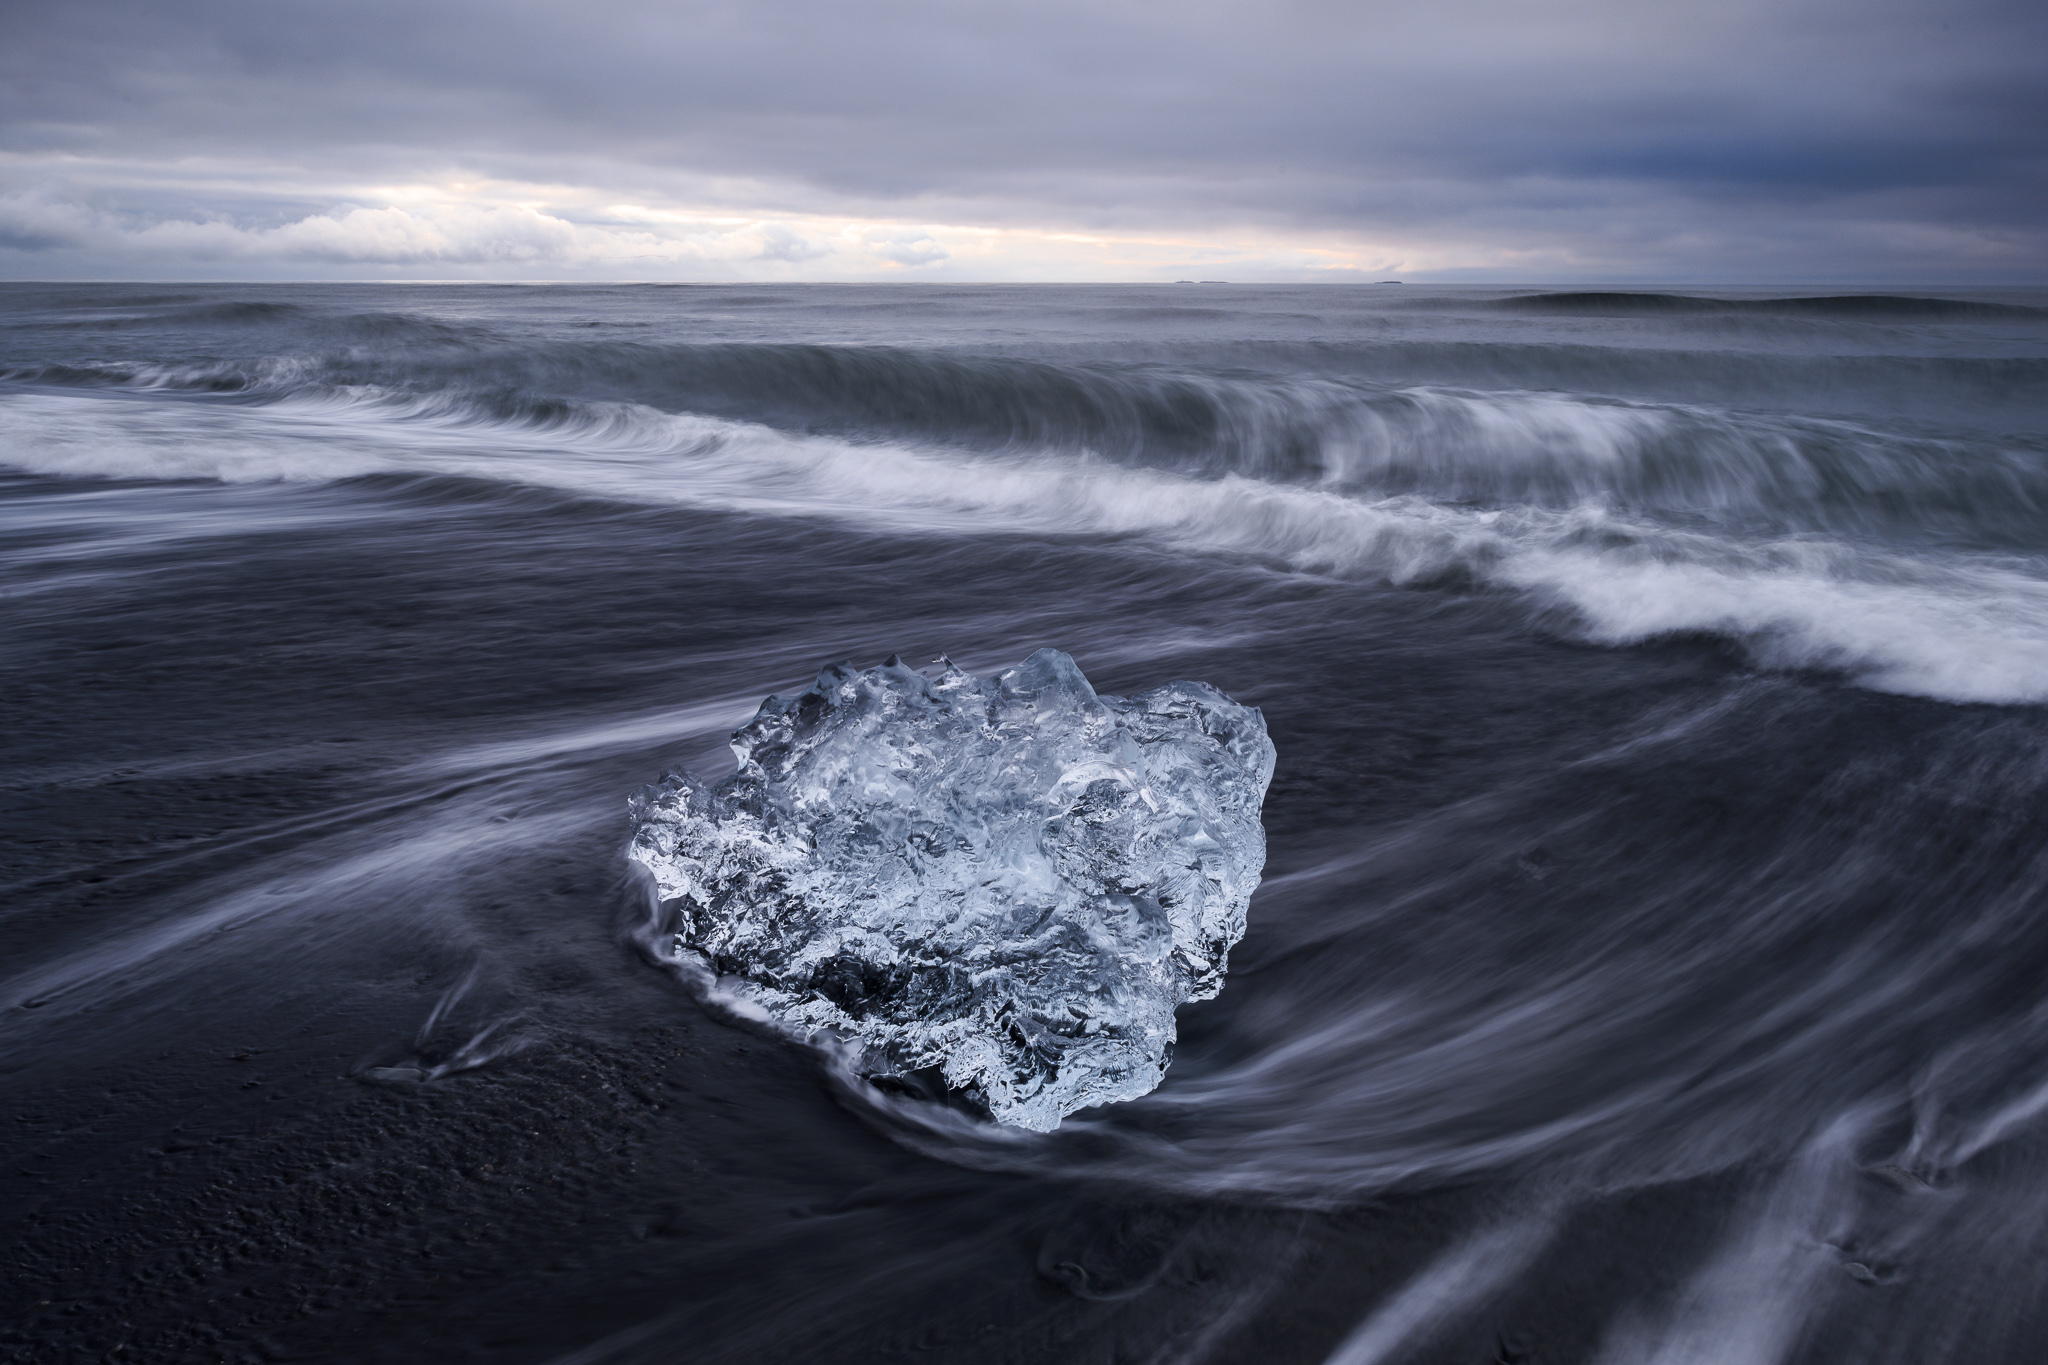
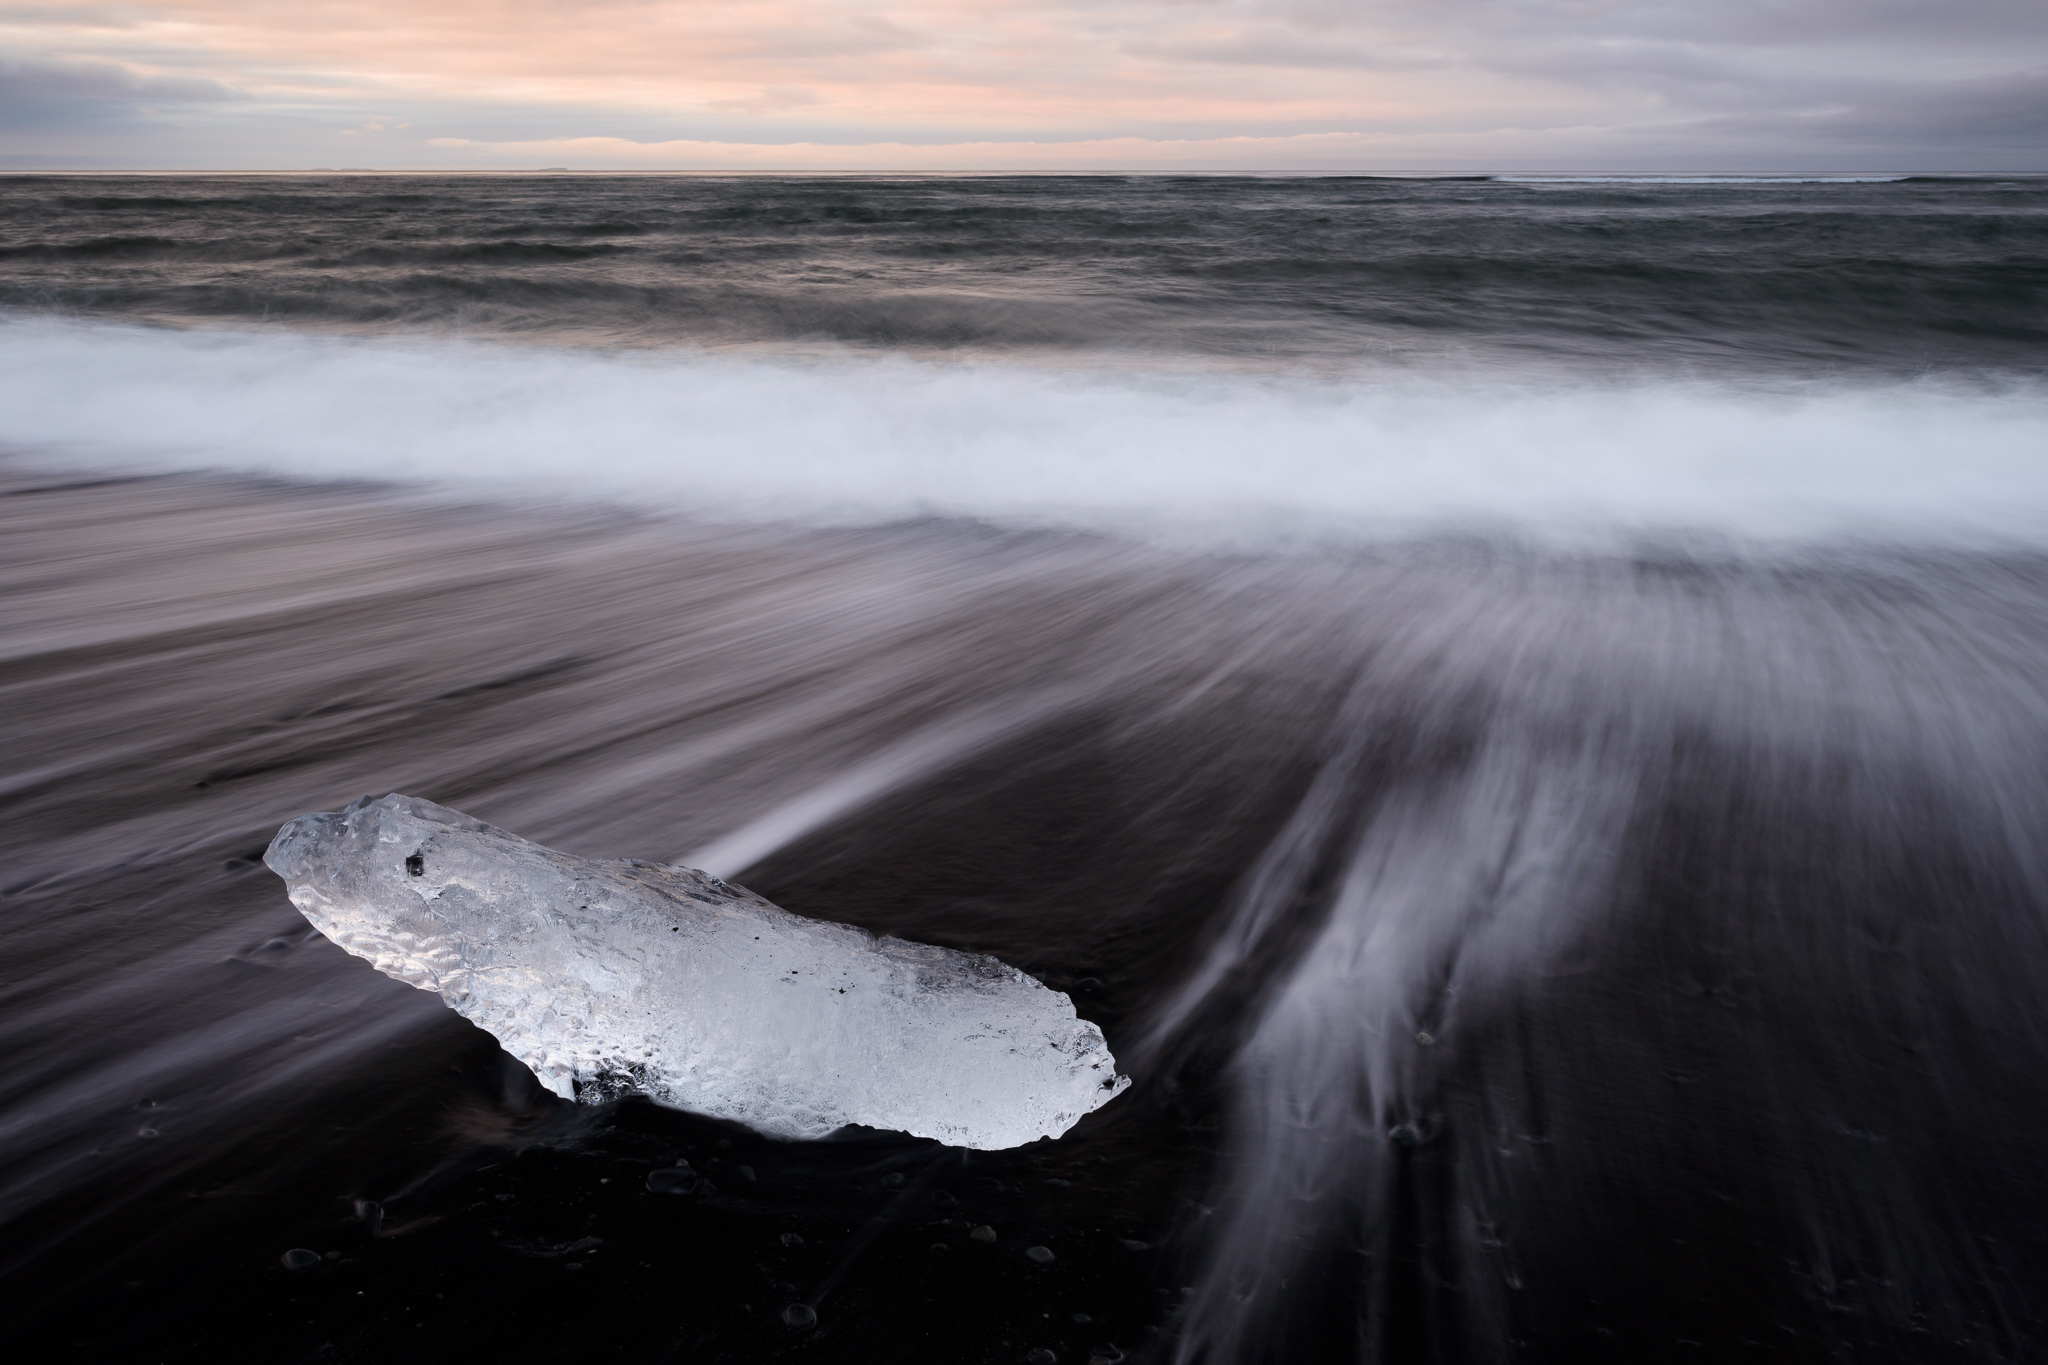
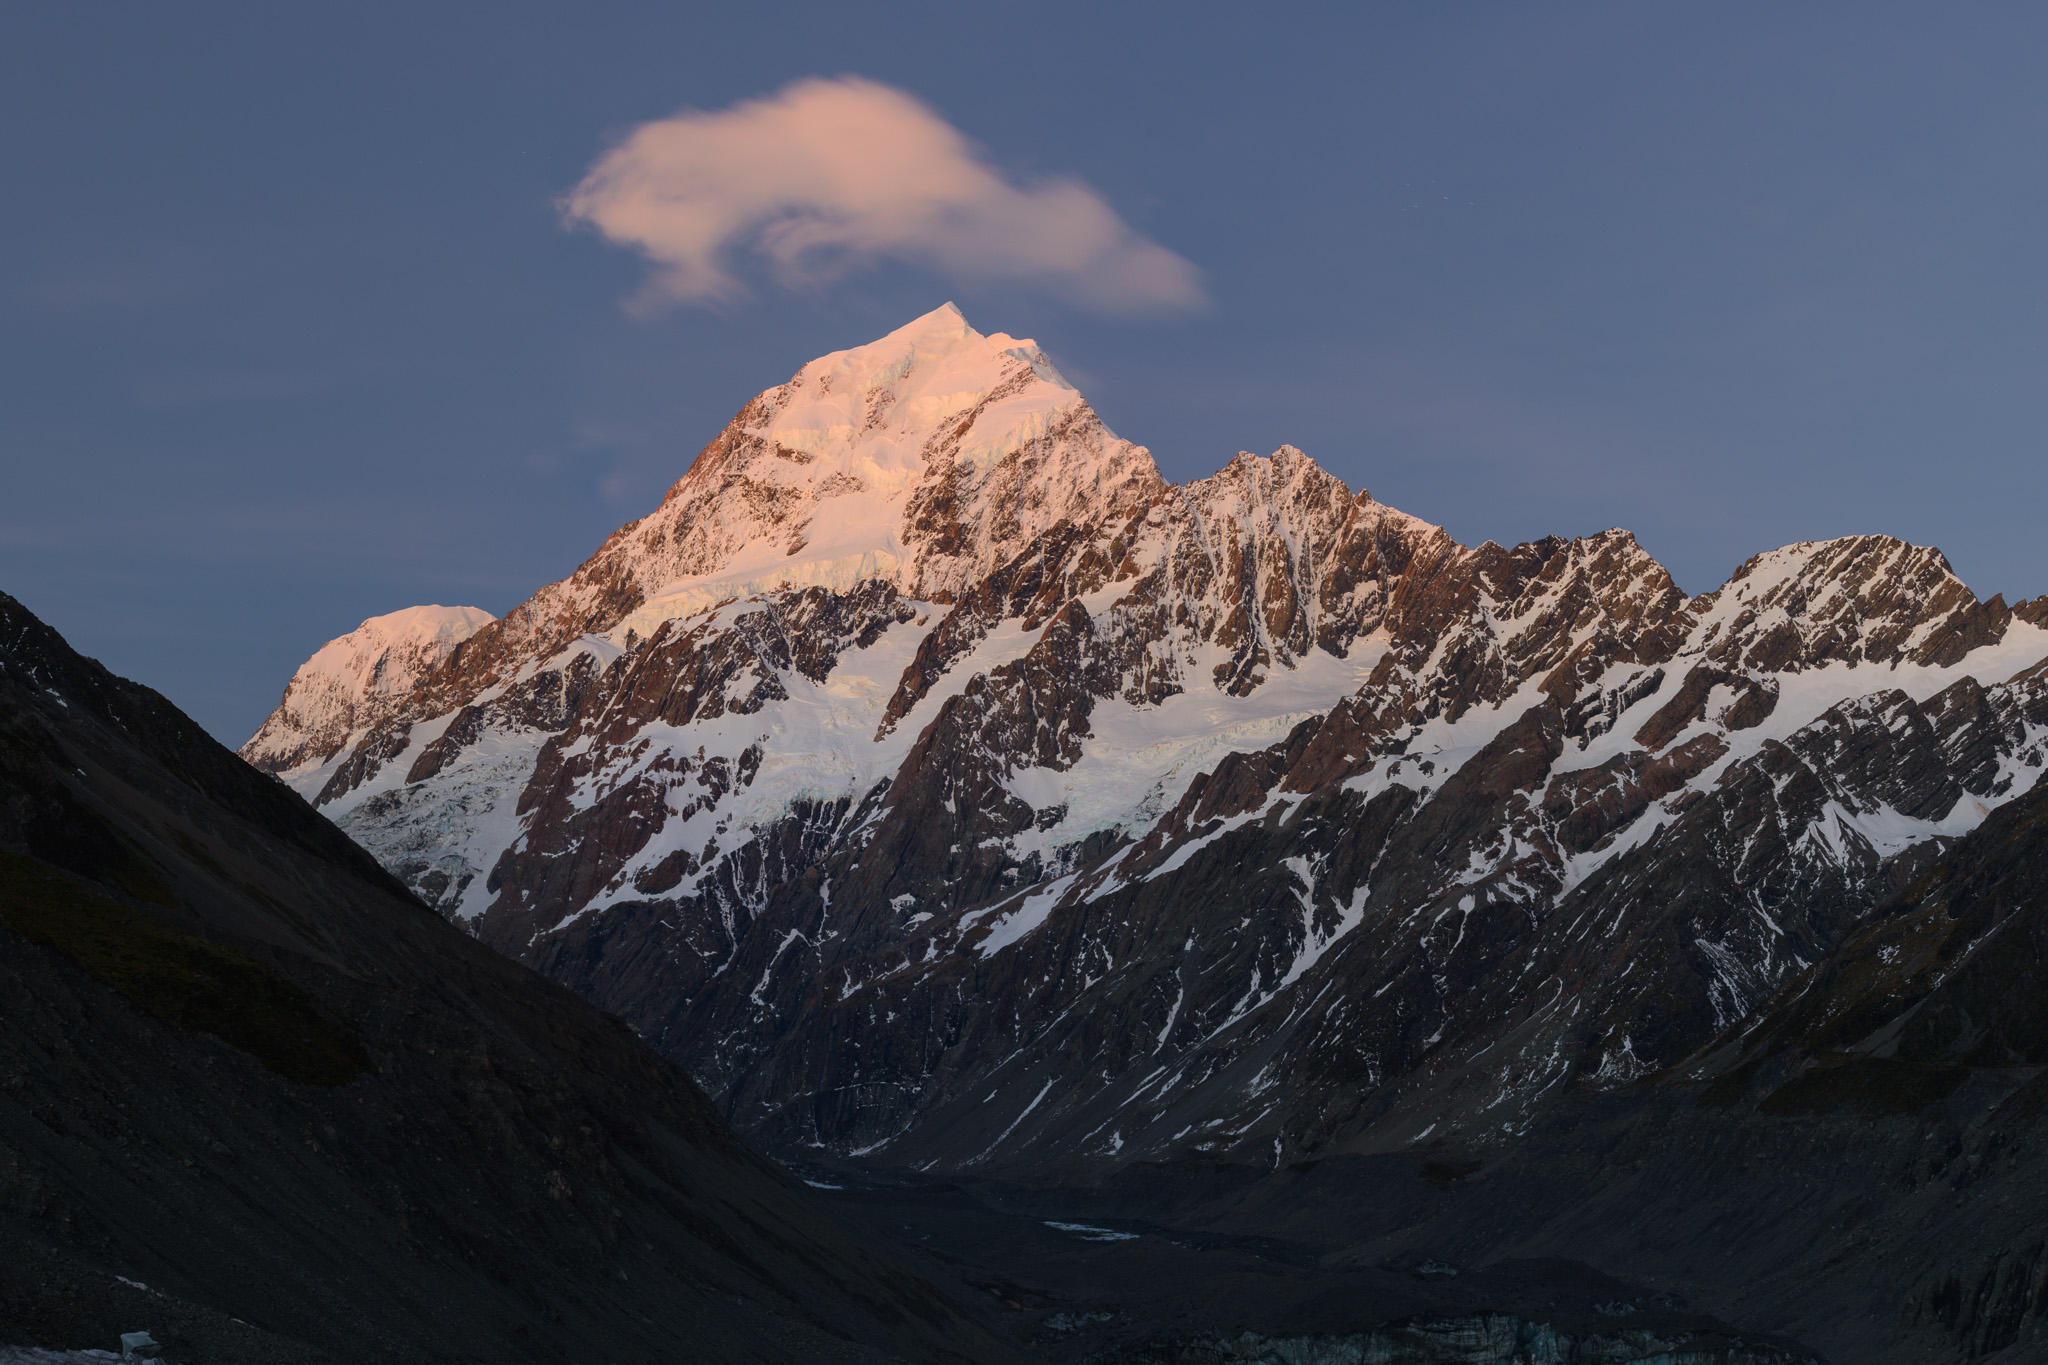
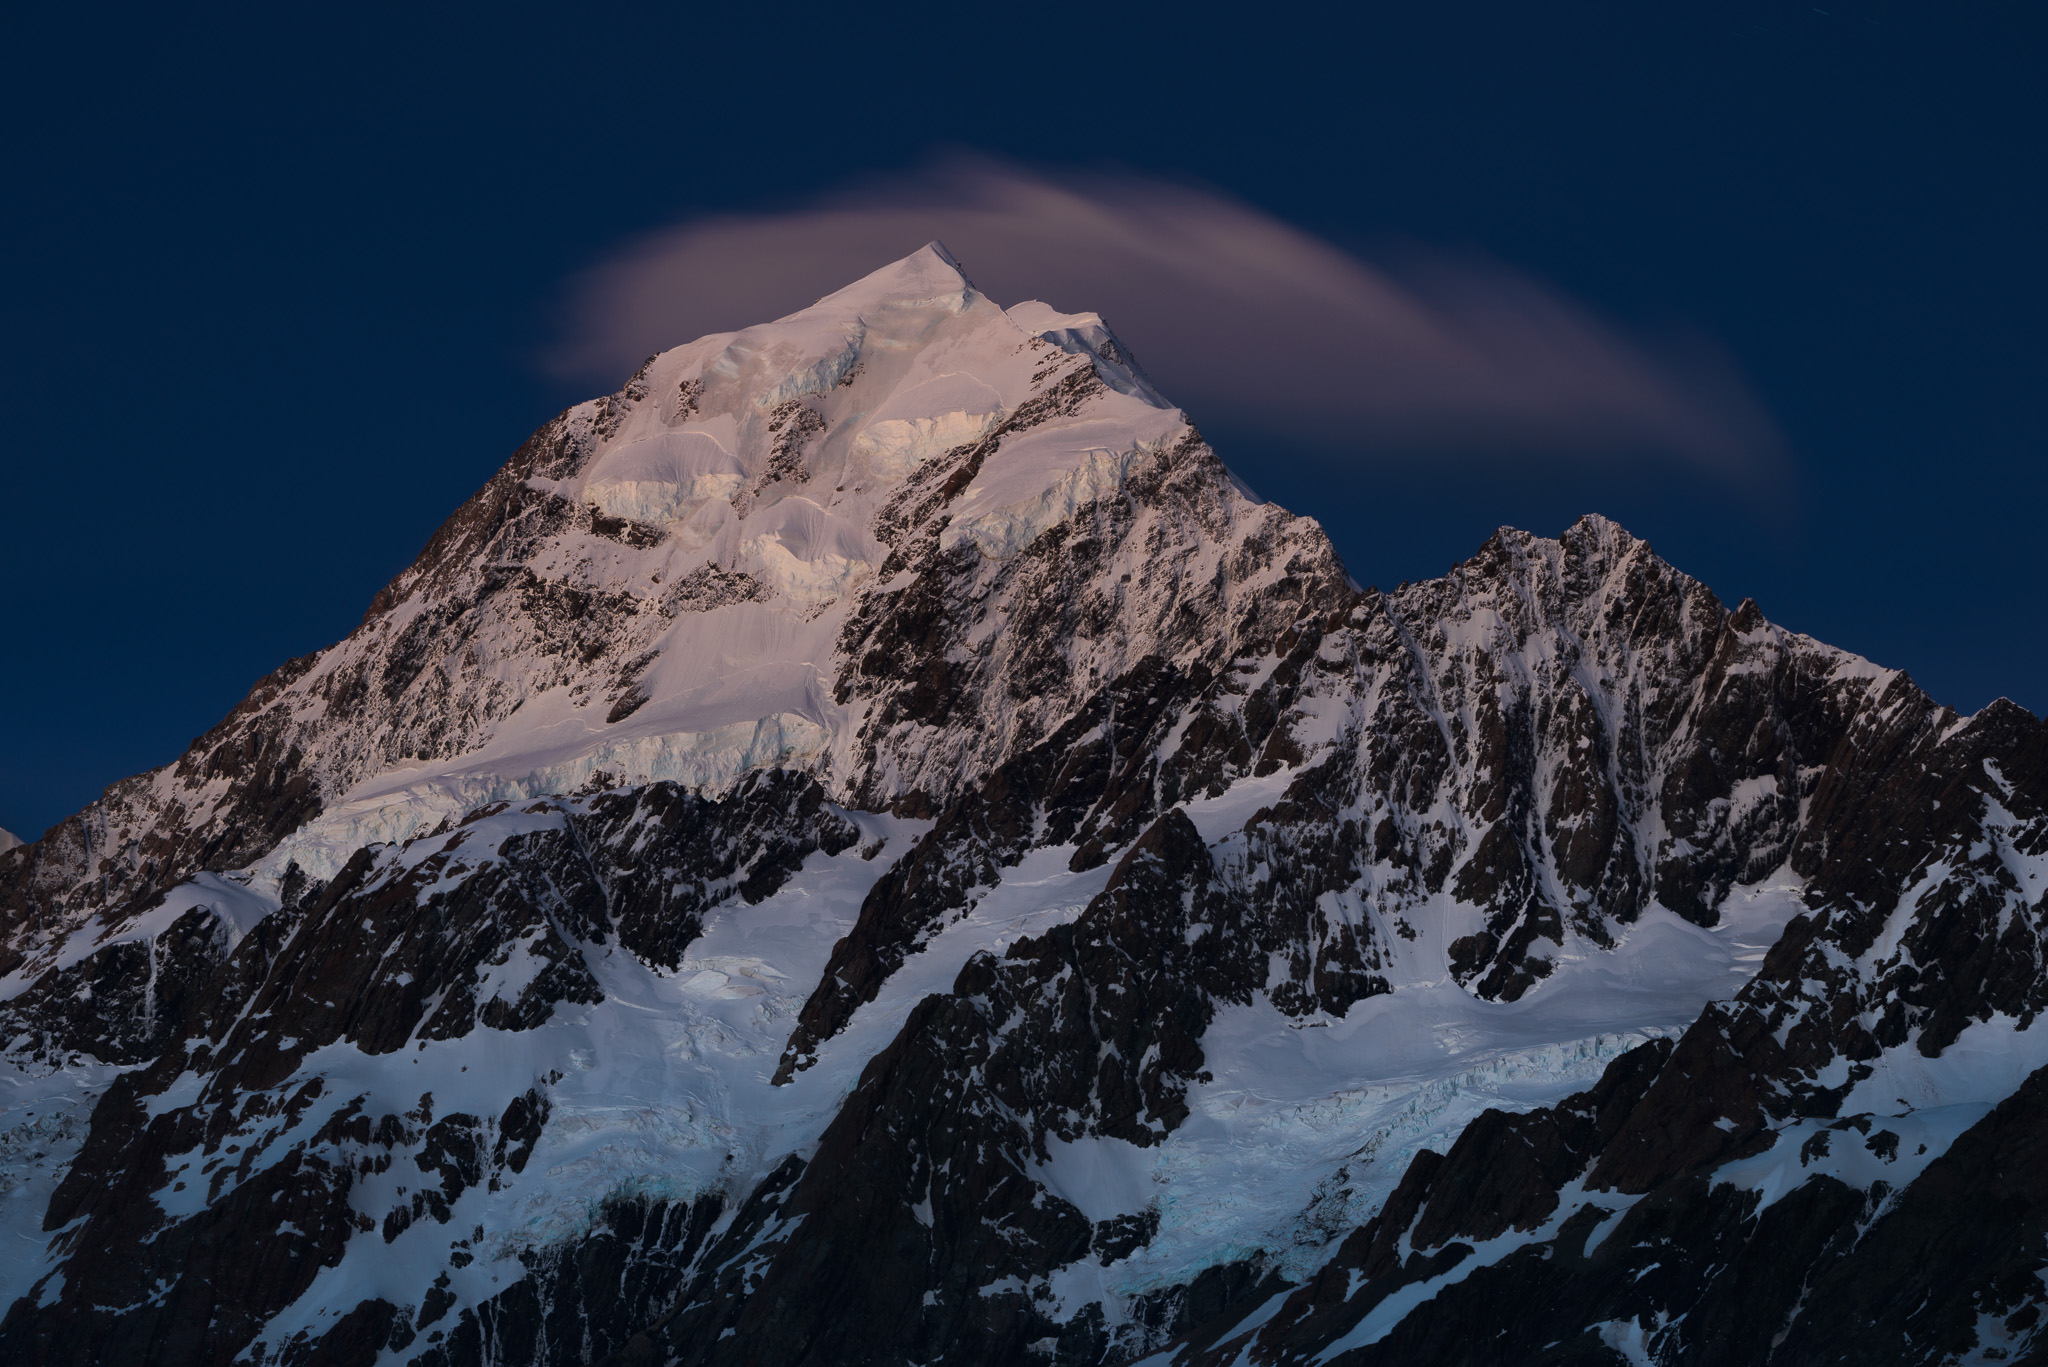
Here’s an obvious example:
I took these photos less than 30 minutes apart. The compositions are essentially the same. What changed is that there was a brief clearing in the clouds when I took the second photo, which added a lot more interest to the image and meshed better with the subject in question.
It’s not rocket science. Timing impacts the light in landscape photography more than almost anything else. By keeping that in mind – especially in combination with what “good light” is in the first place – you can improve your landscape photos just by waiting around.
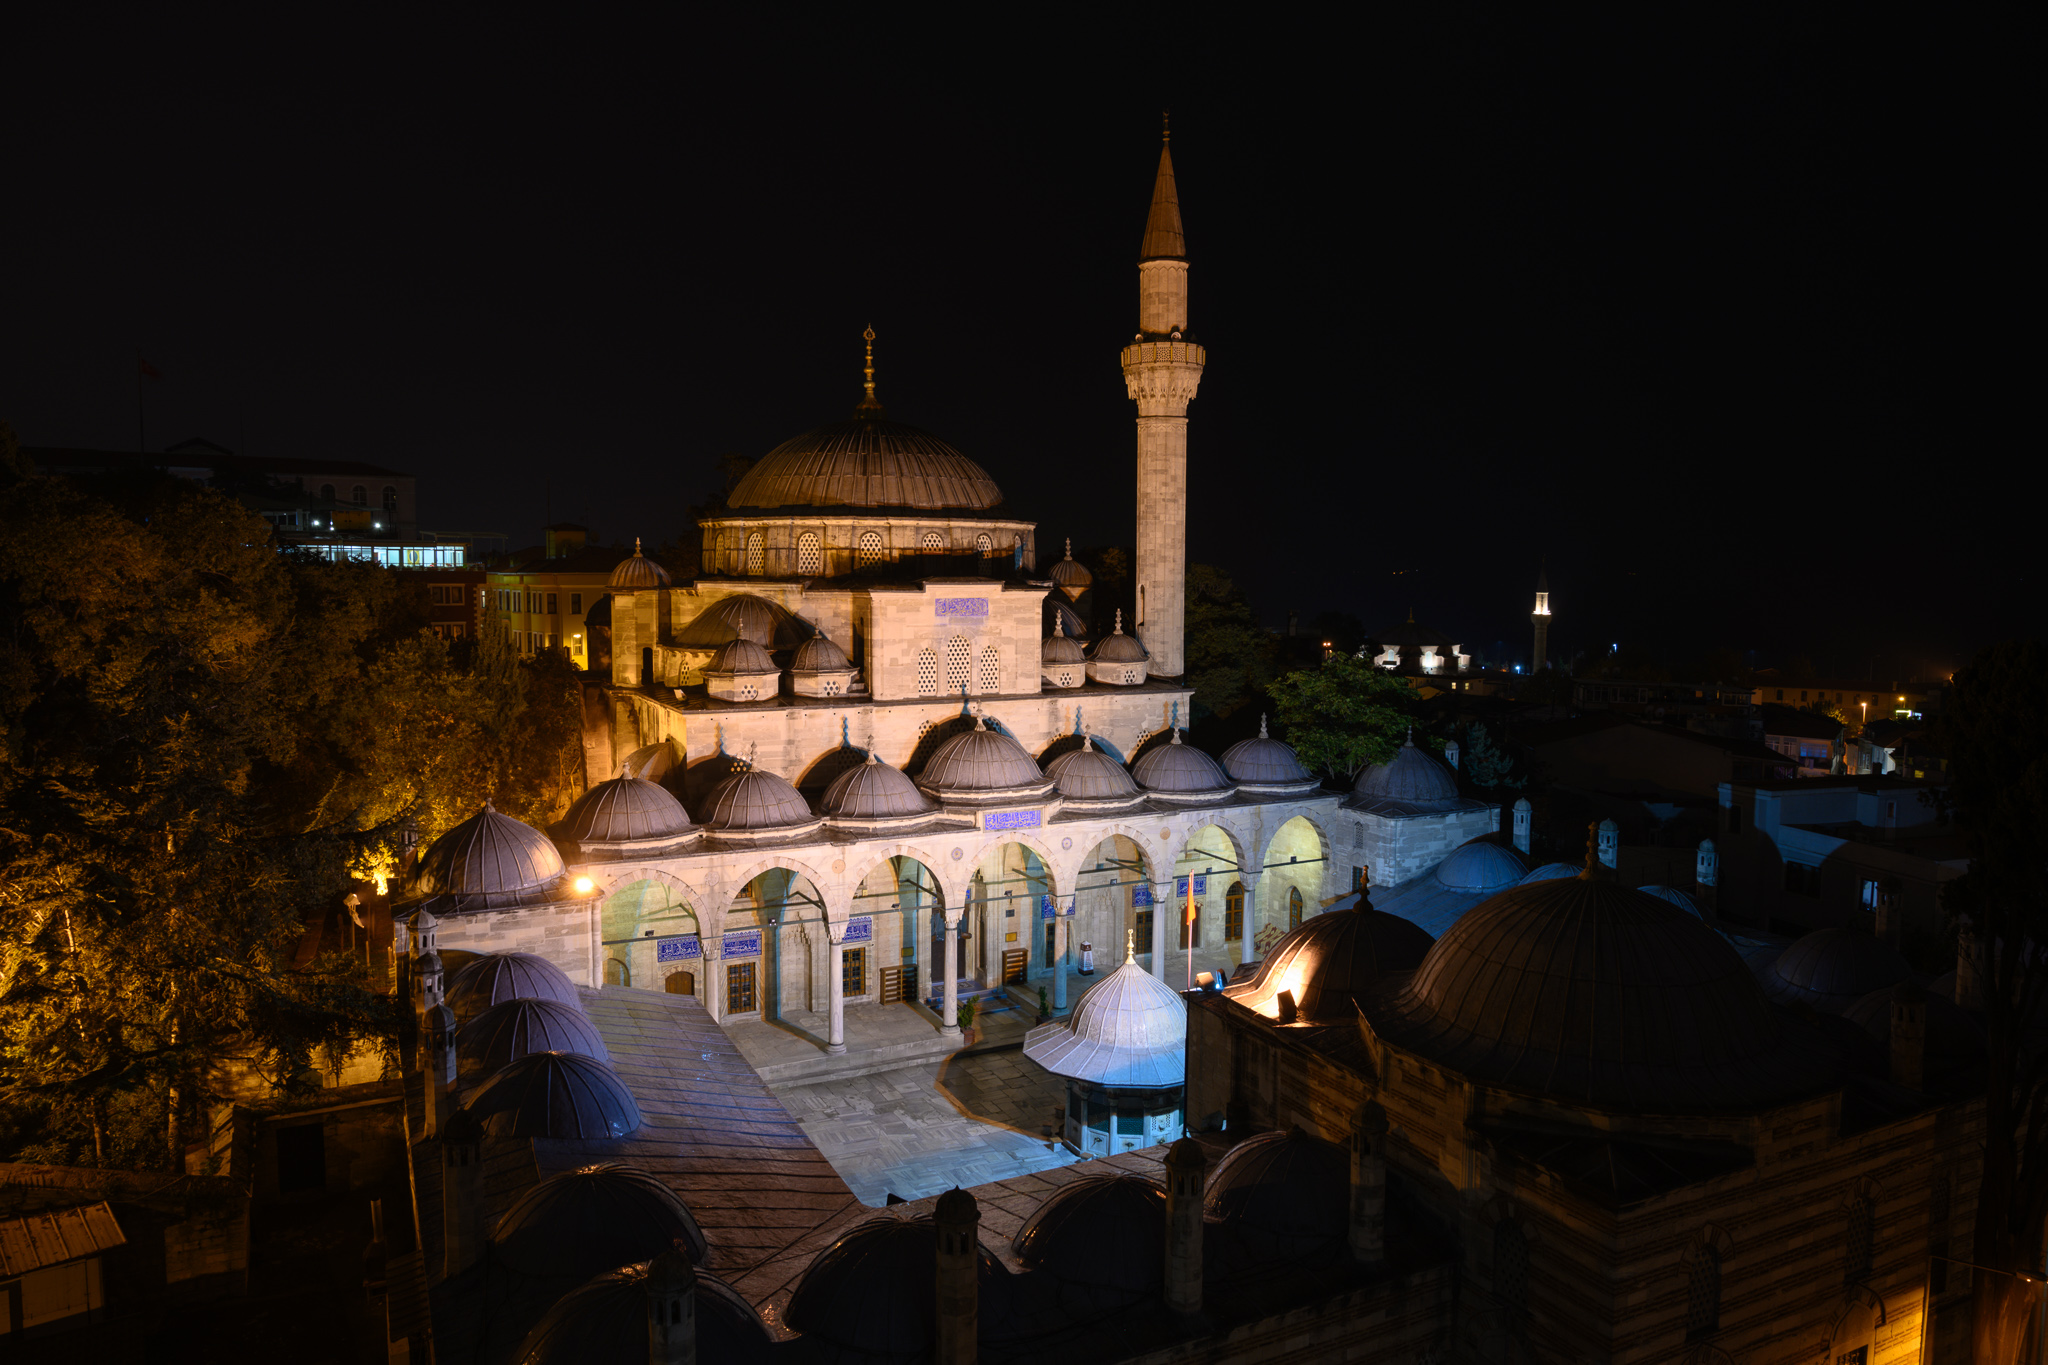
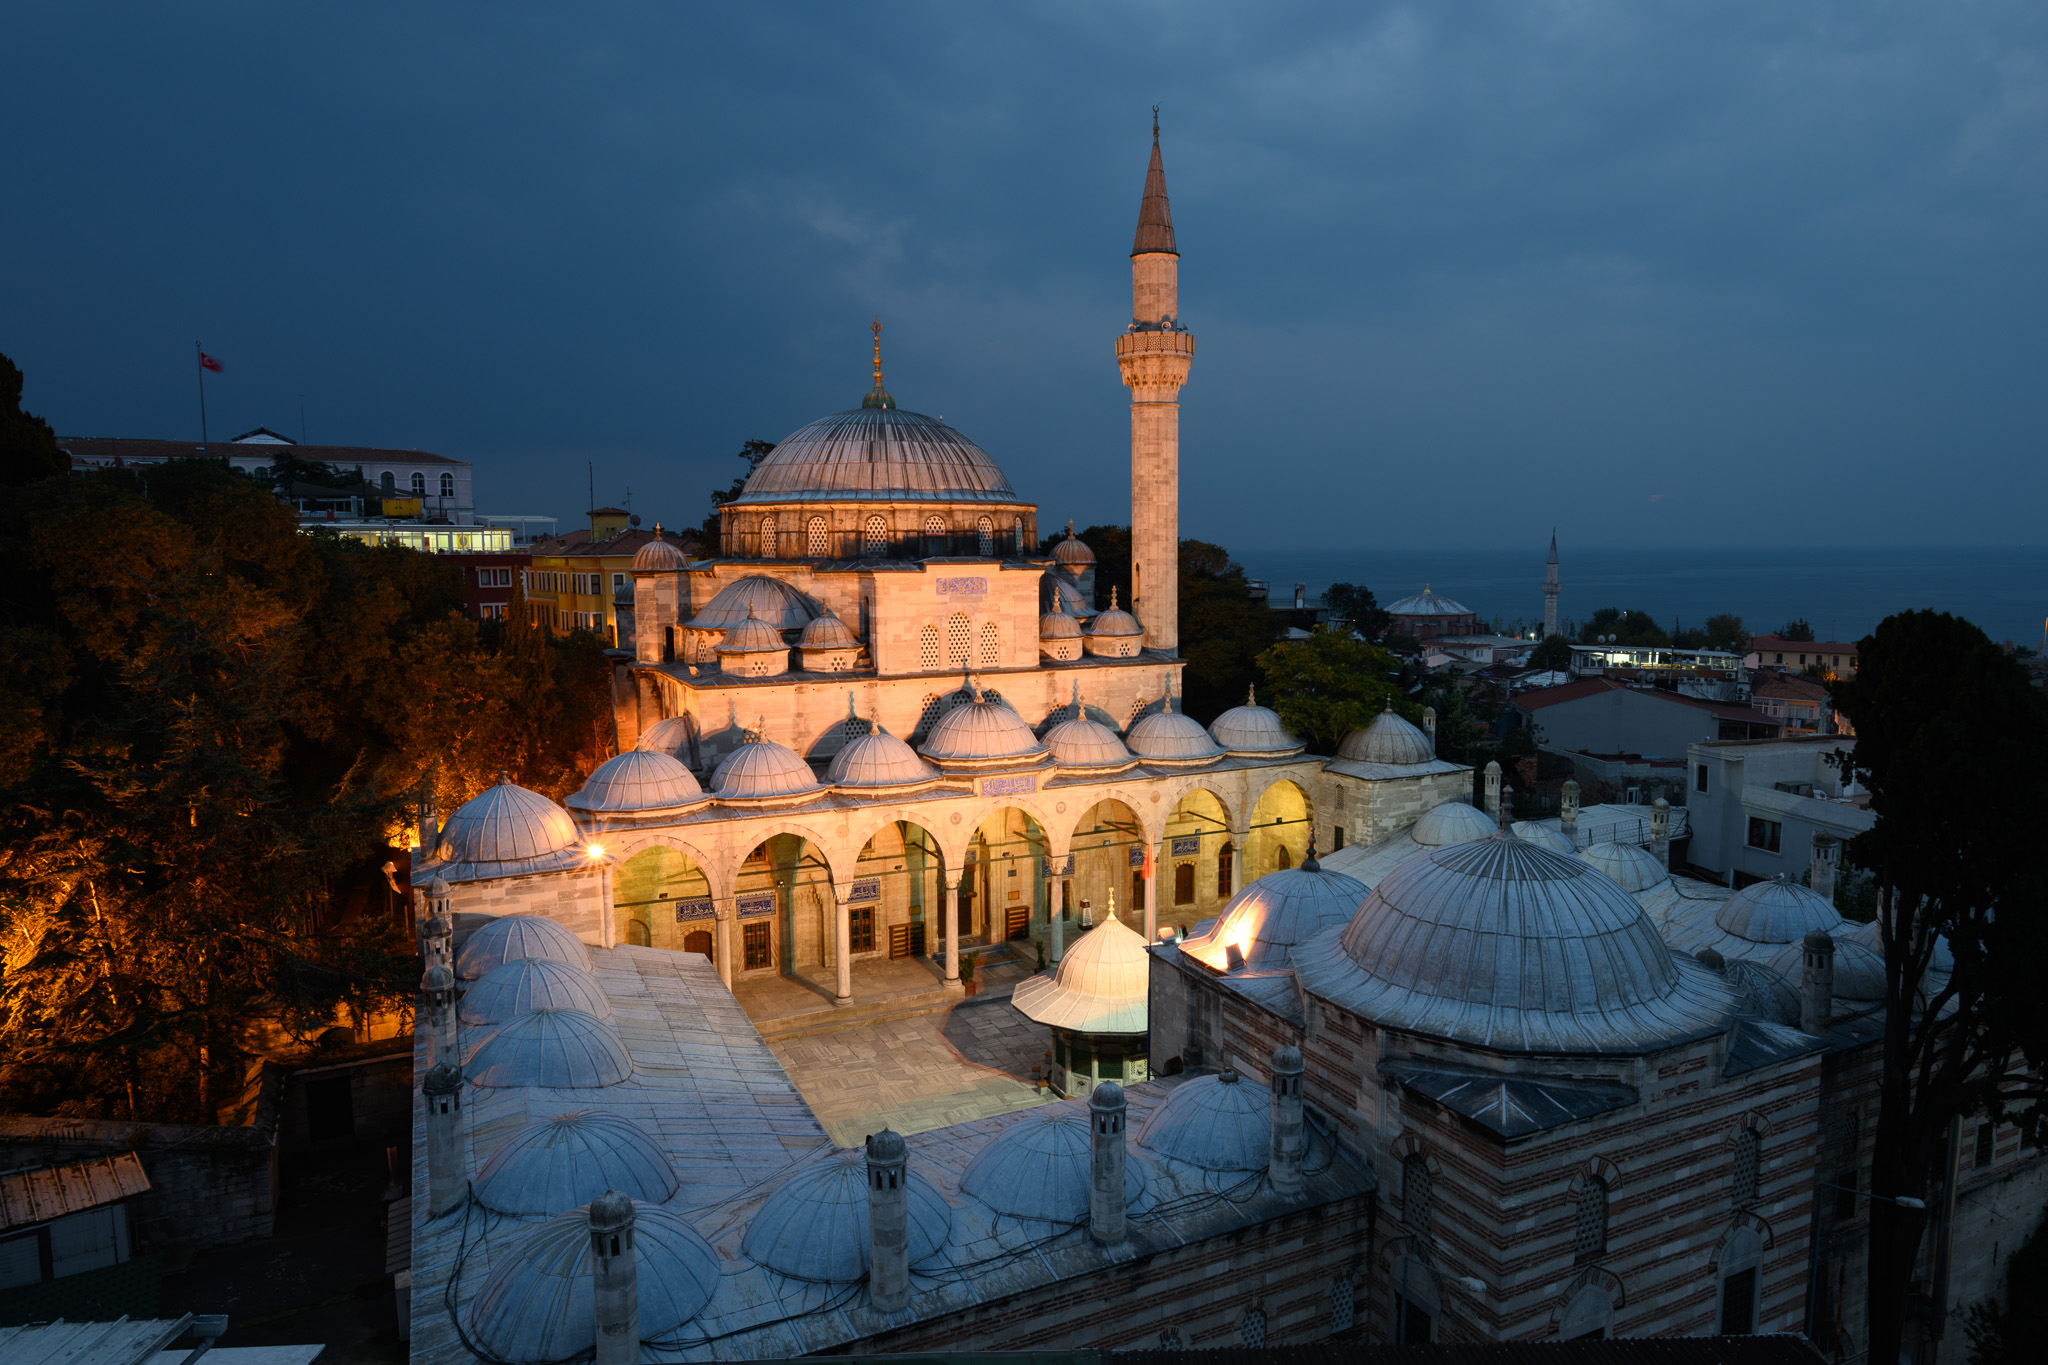
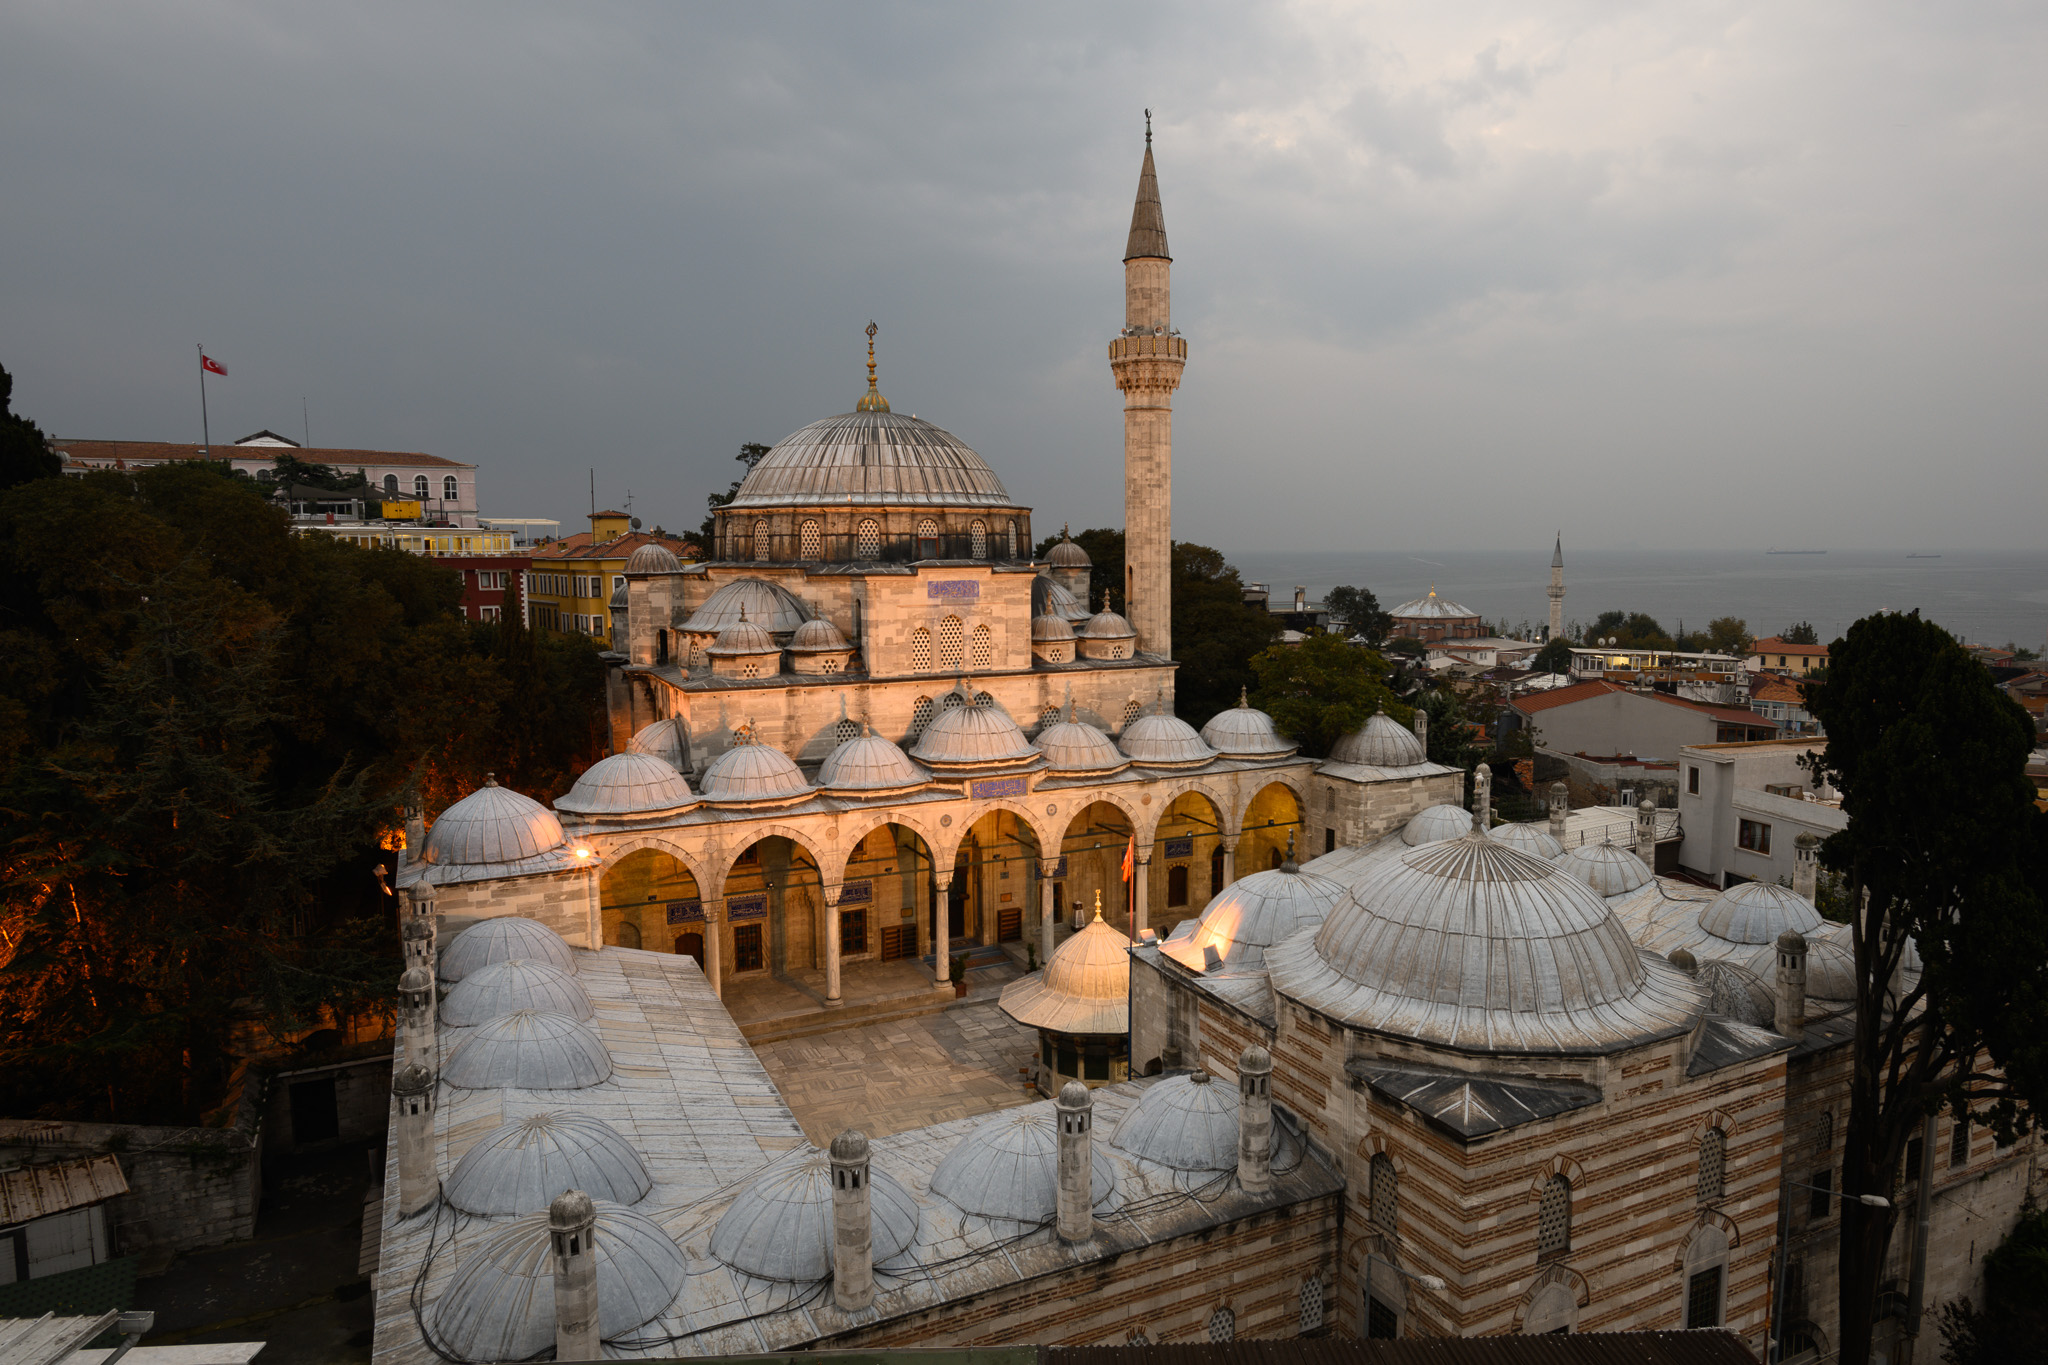
Here are a couple more examples. The first set is a cityscape rather than a landscape, but once again, I didn’t have any power to change the light in this frame myself. I just waited. In this case, I like the second photo the best of the three:
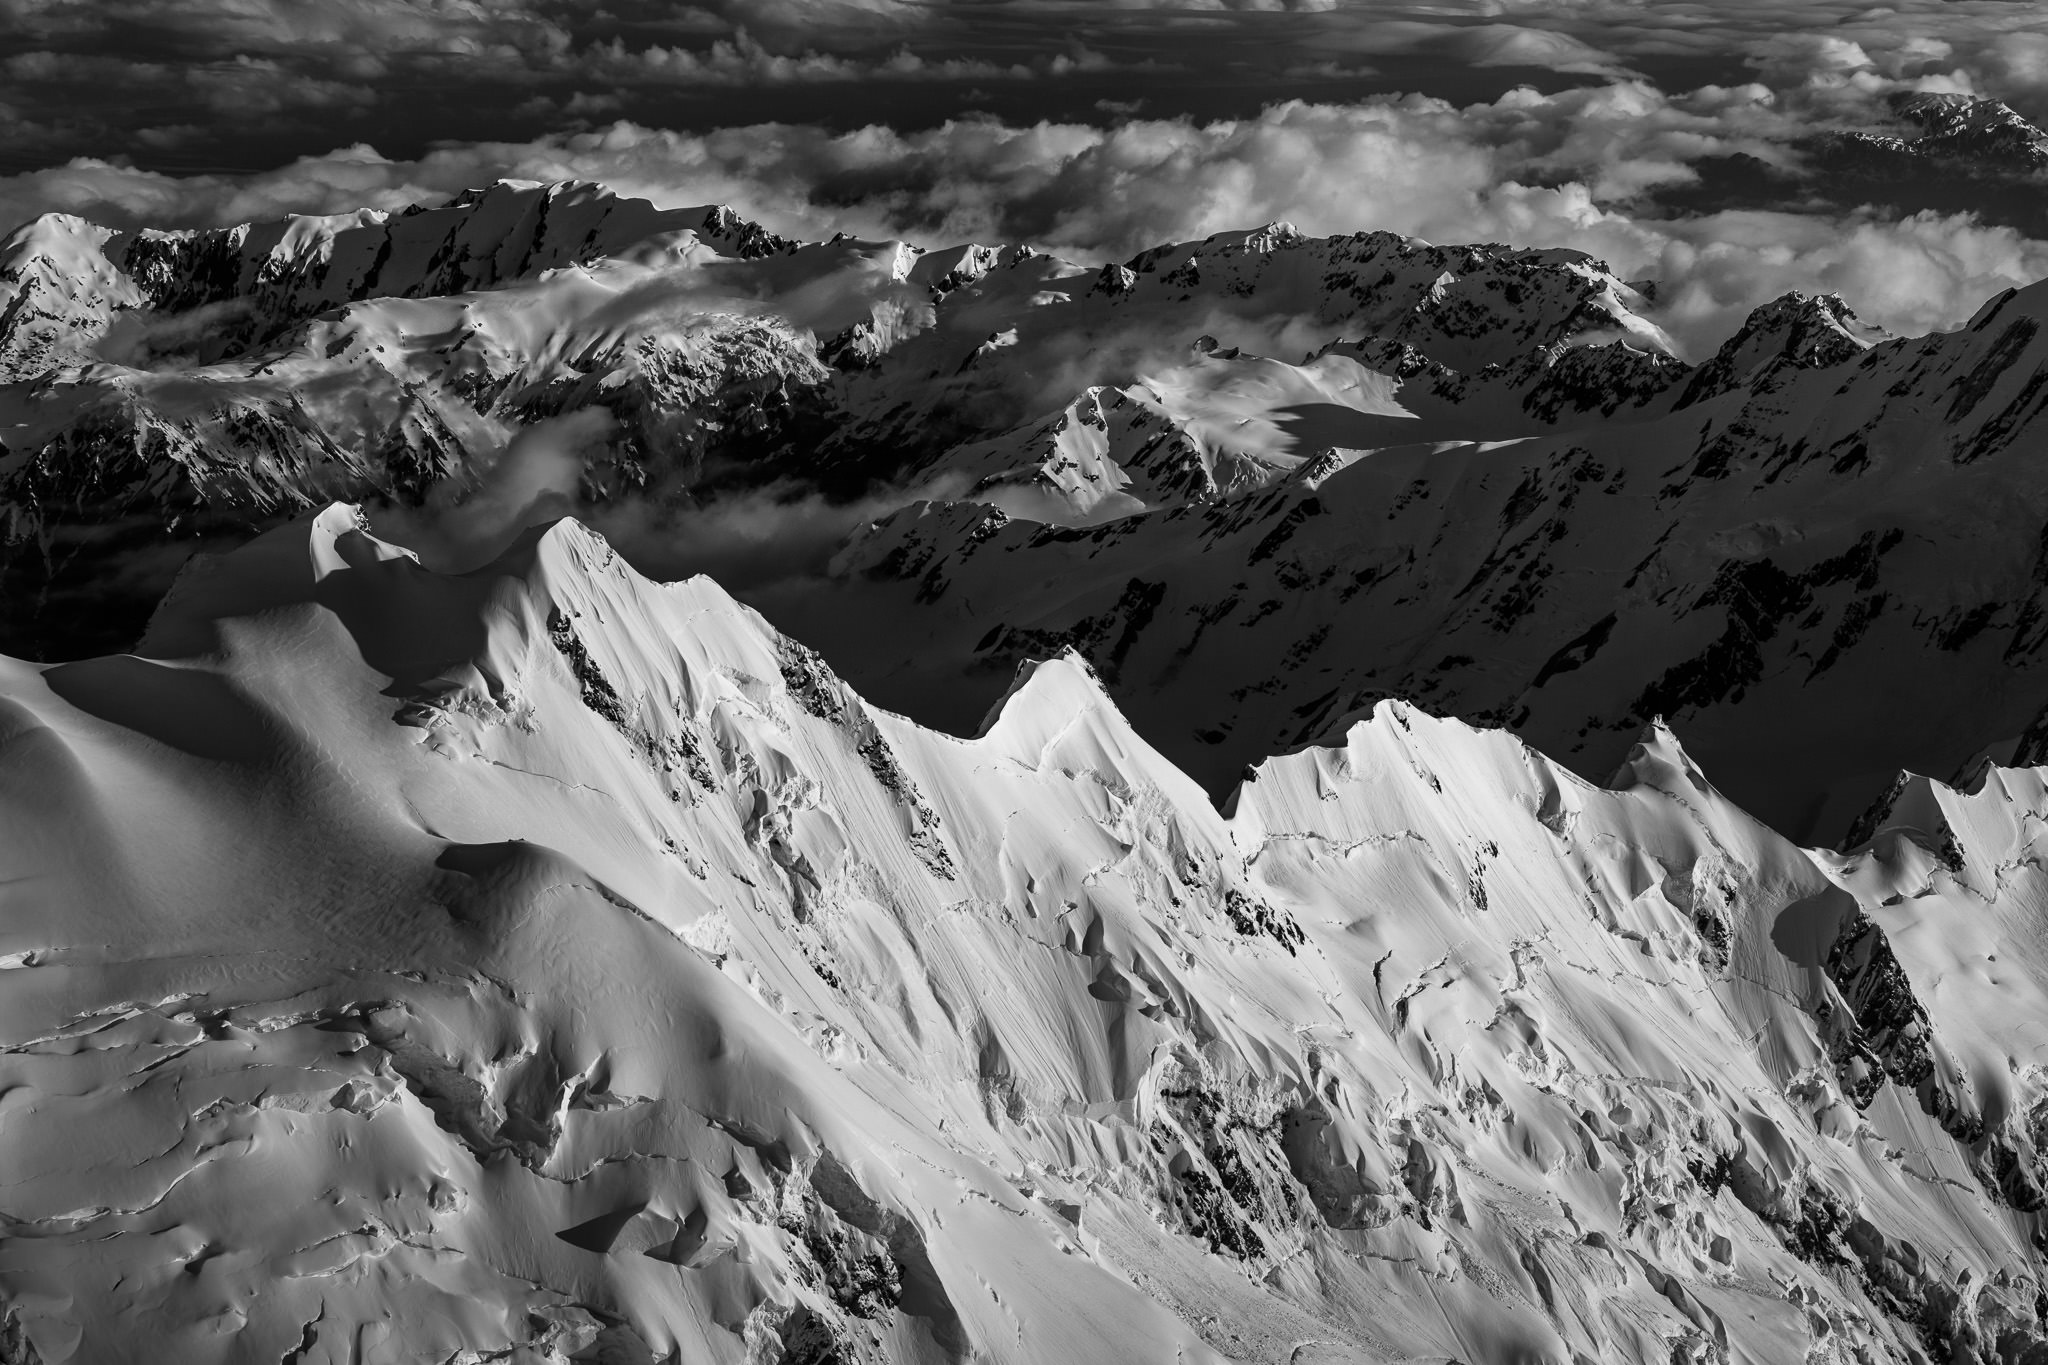
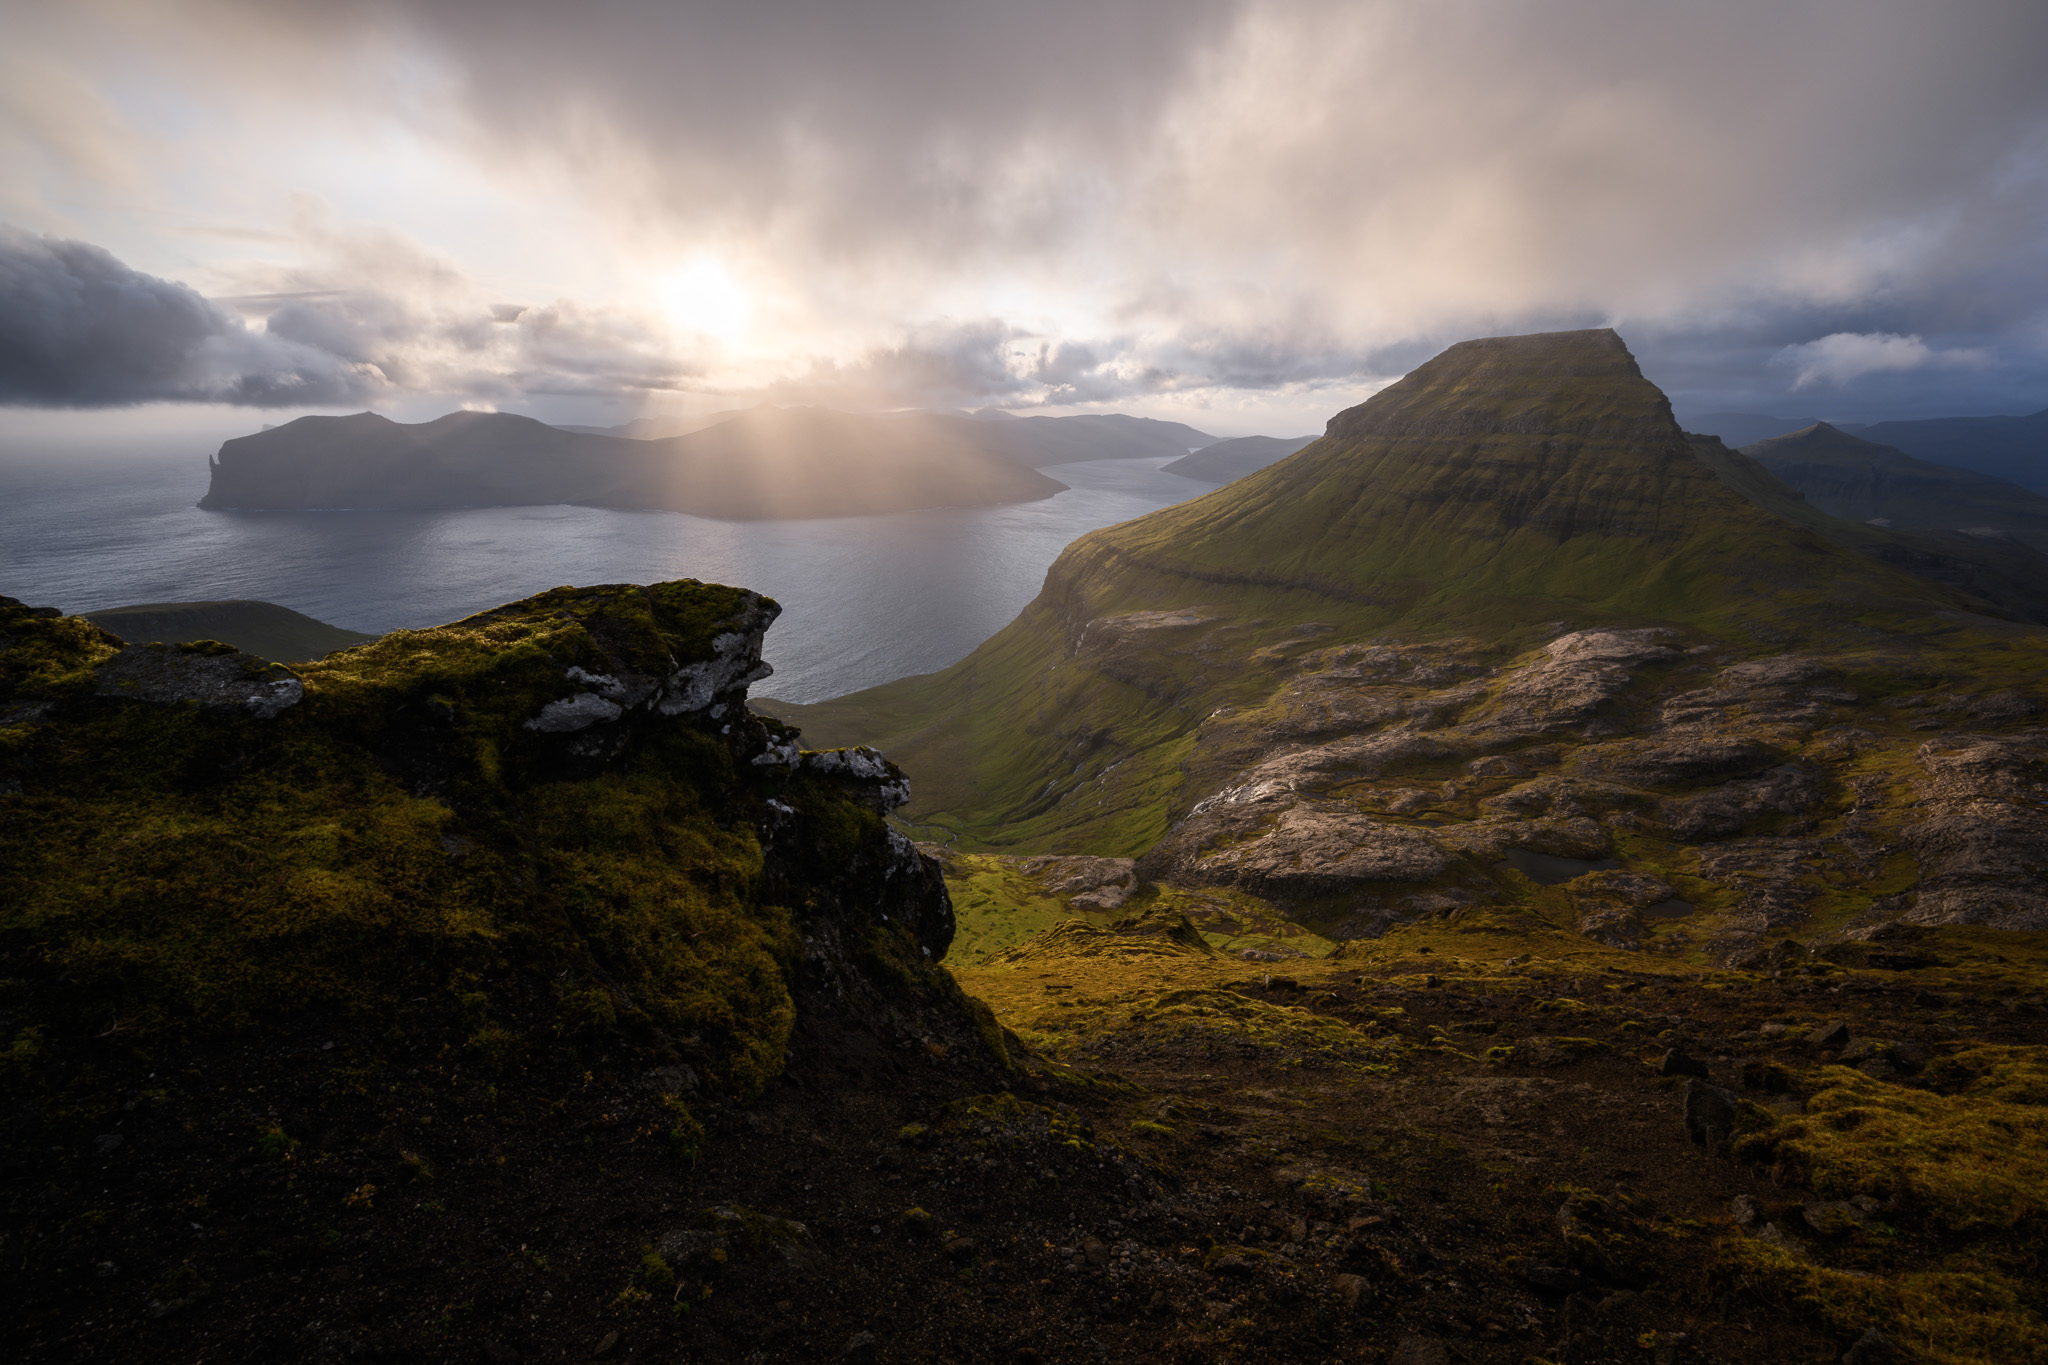
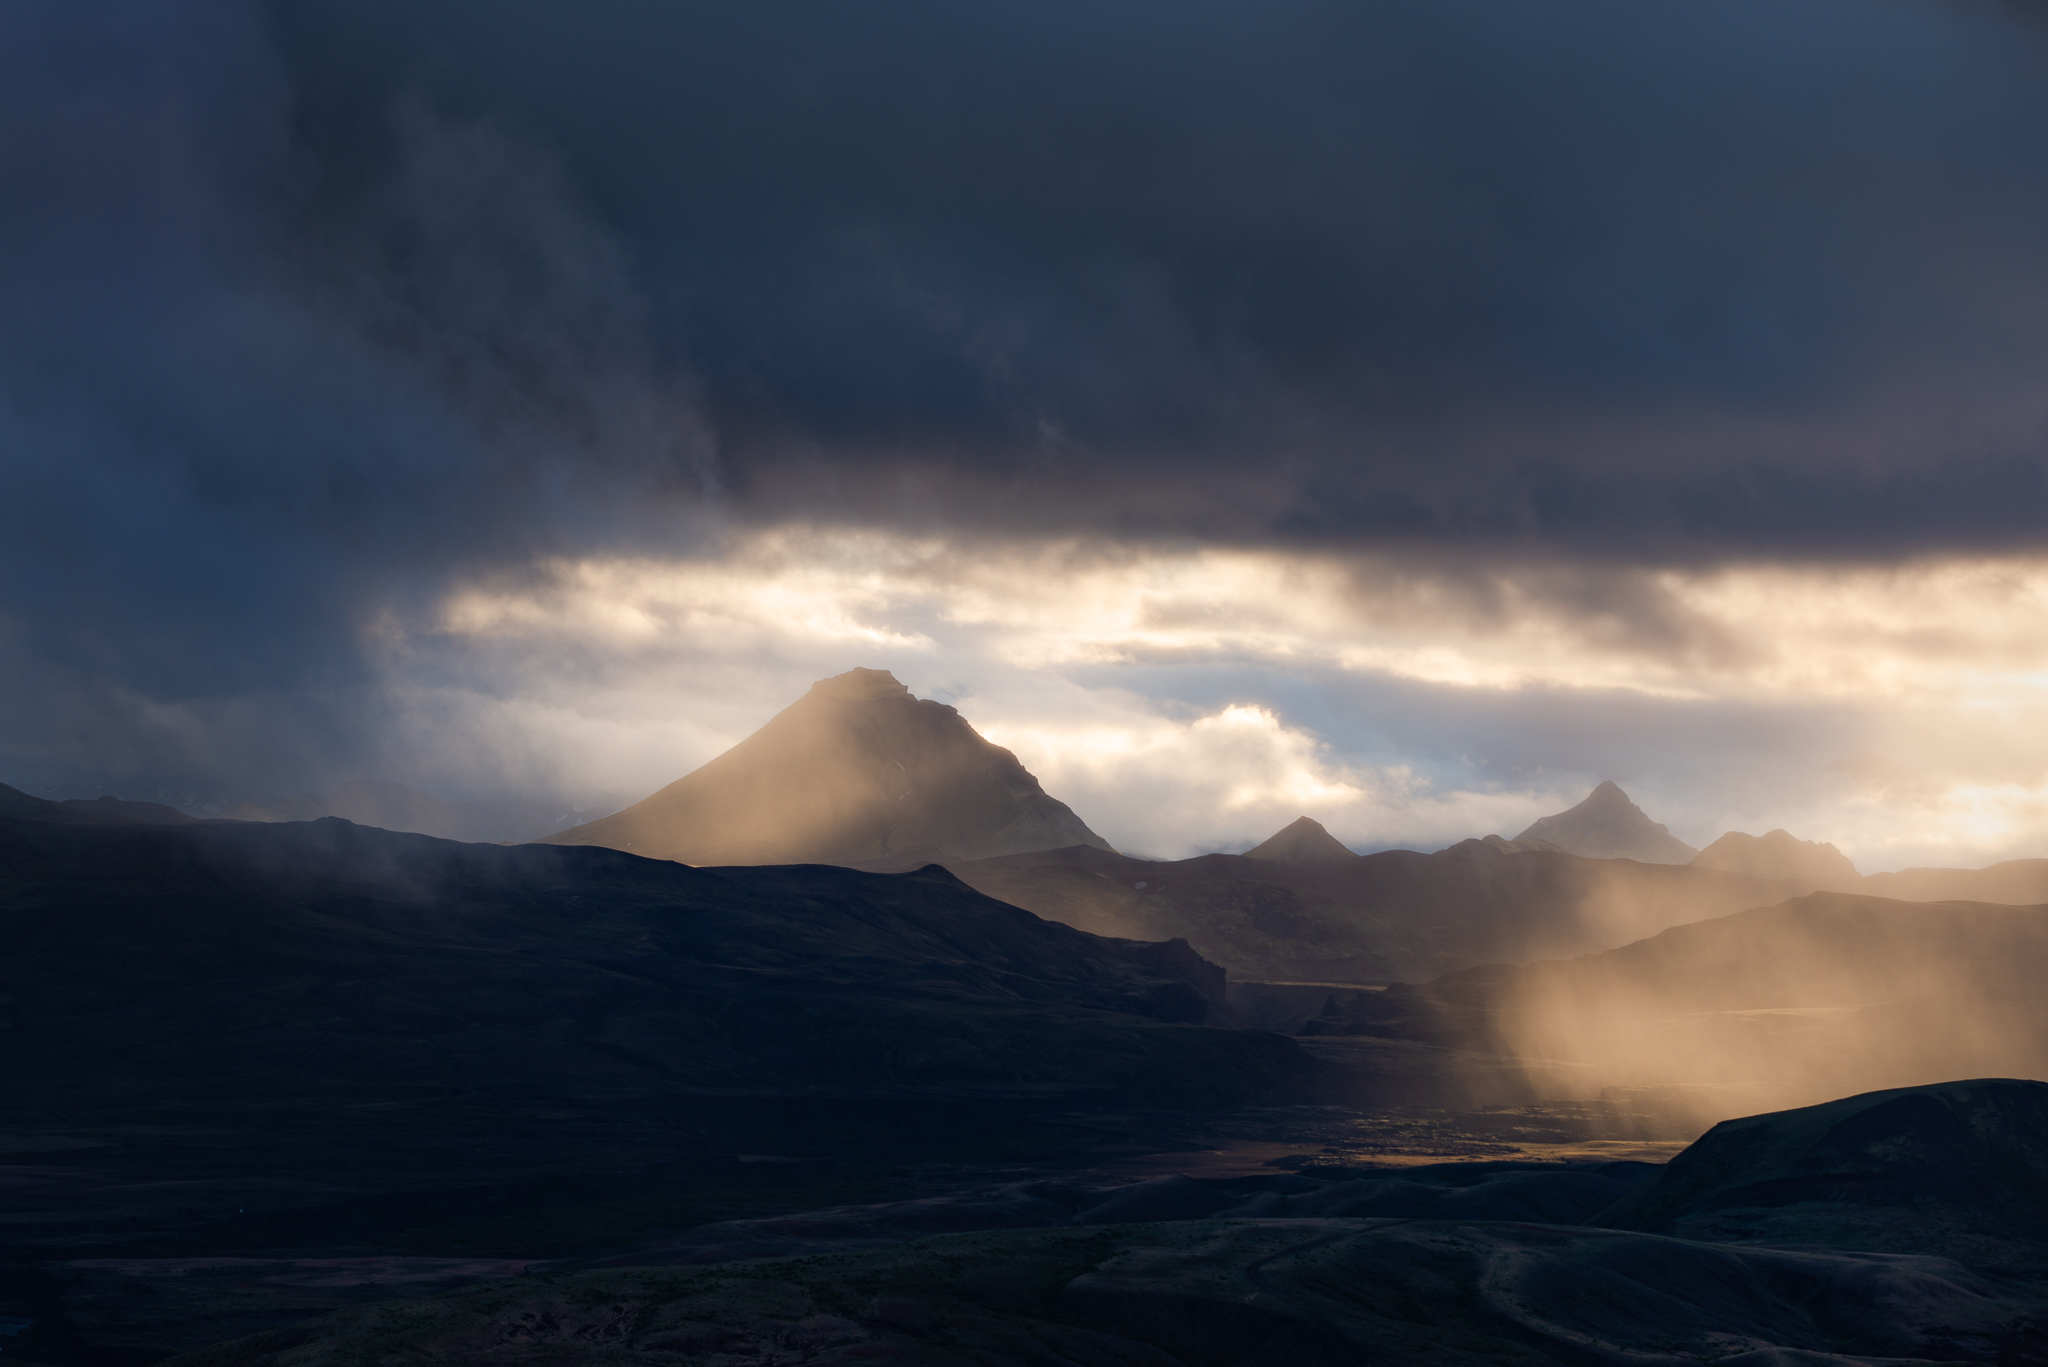
And then back to a landscape photo. For the following subject, an intense and moody atmosphere was my goal, thanks to how imposing it is. Watch how the light in the three images gradually gets more ominous, and the photos also gradually improve (at least to my tastes):

That’s the power of timing. But timing isn’t the only way you can control the light in your landscape photos. The other helpful tool is direction.
Direction
Unless the sun is directly overhead, you can control the type of light in your photo simply by pointing your lens in different directions. It’s particularly apparent near sunrise or sunset. Point at the sun, and you get high-contrast backlight; in the opposite direction, front lighting; off to the left or right, side lighting. Weather conditions can also look different as you face in different directions.
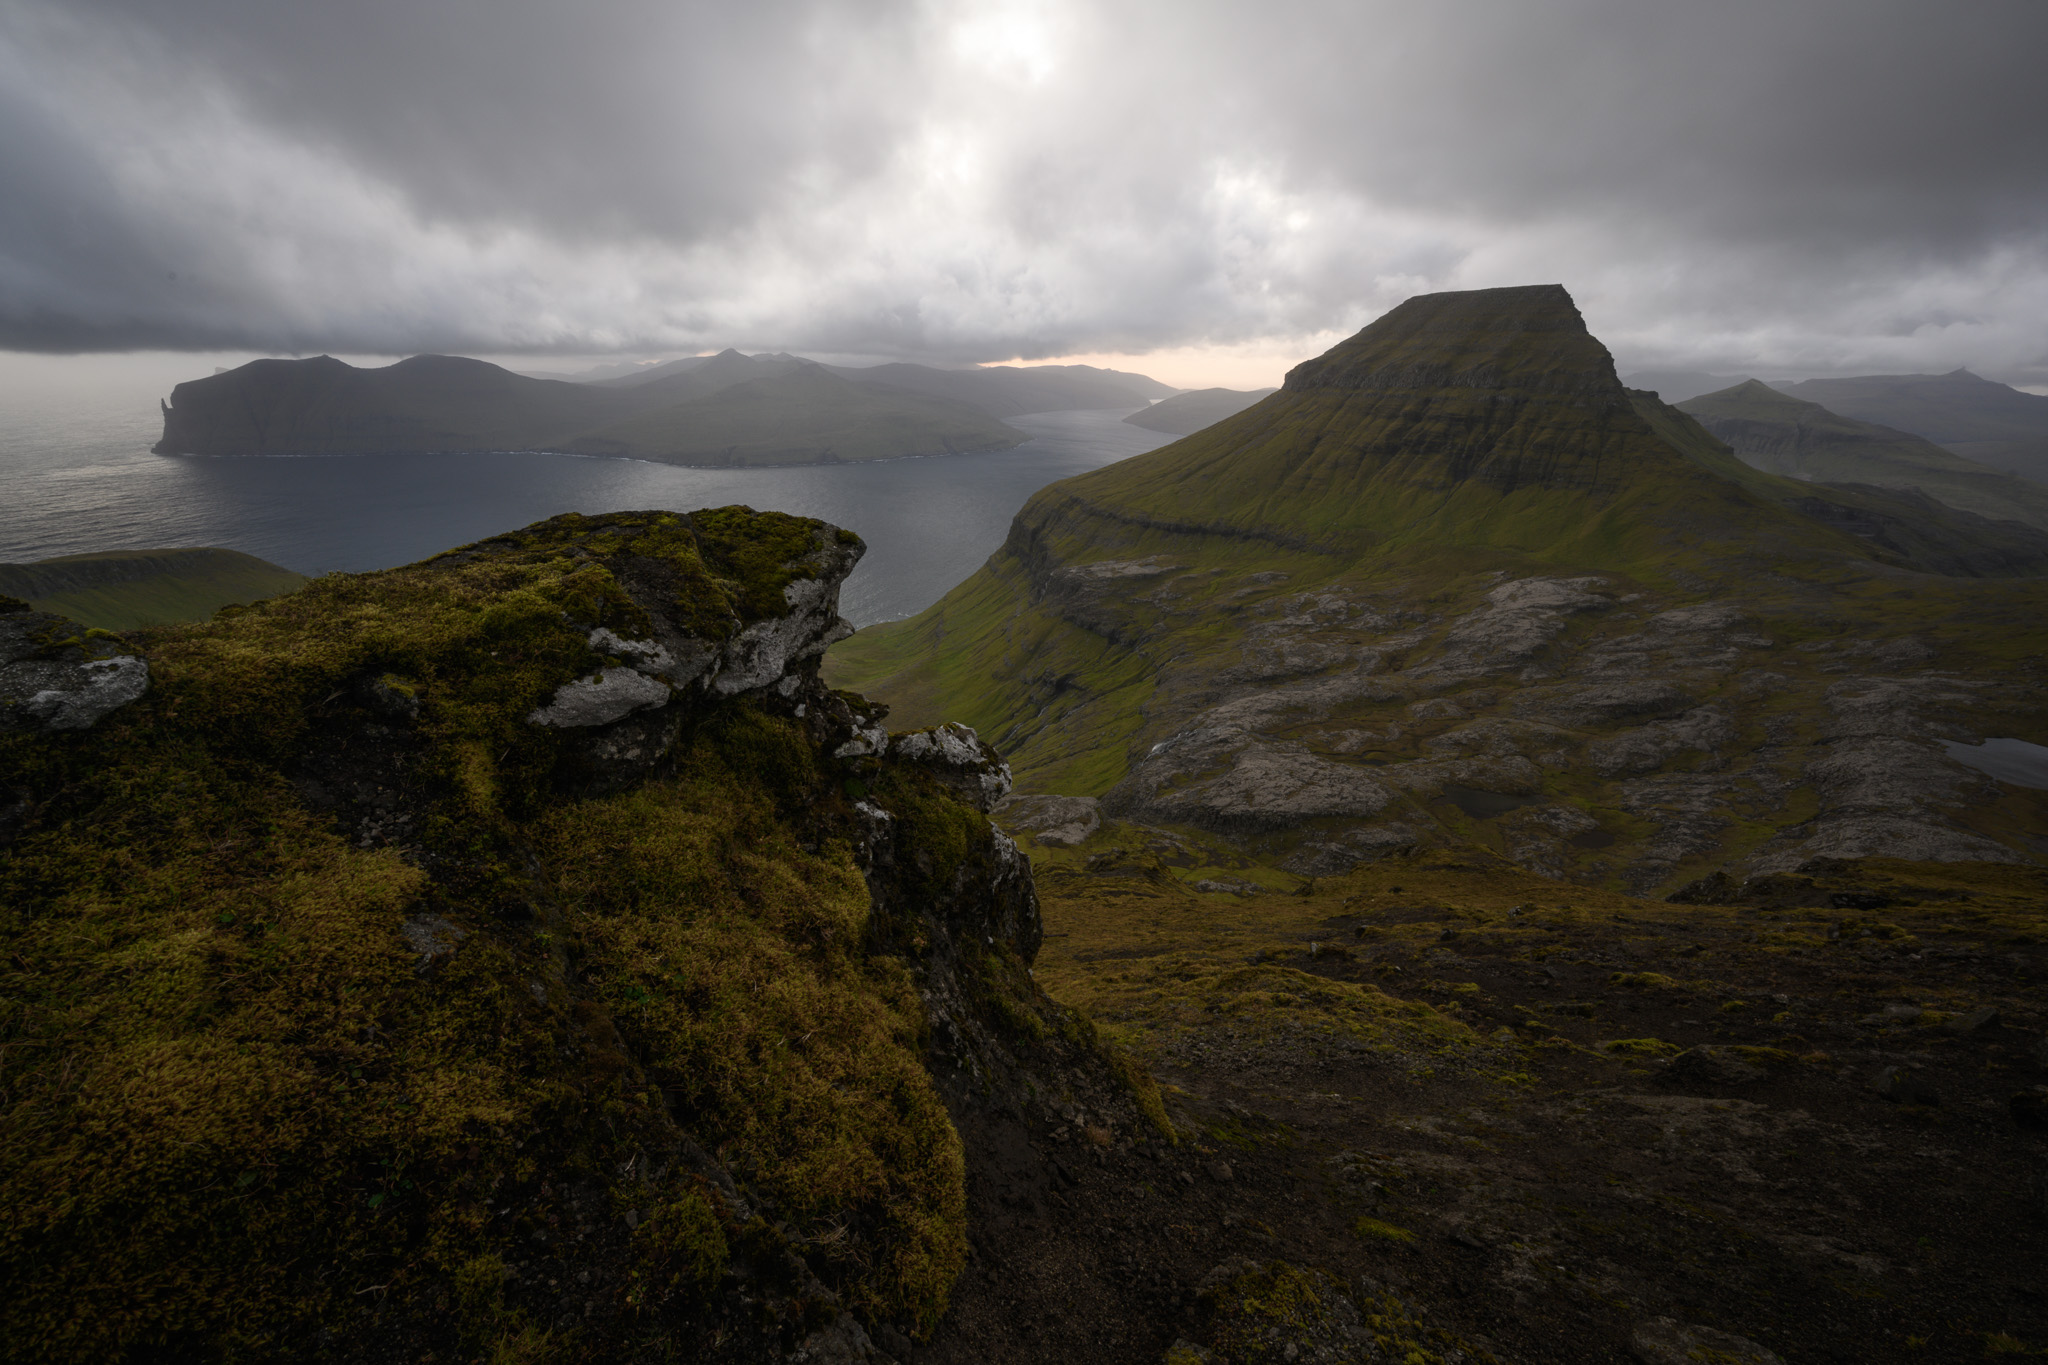
Here’s a good case in point. The following photo has a calm, misty atmosphere, like the feeling of a gentle rain:

This photo, on the other hand, is punchy and dramatic. It’s much more intense, and certainly the light is different:
Yet I took these two photos about 200 seconds apart from one another. The difference in their light isn’t because the sun or clouds moved position; the sun was behind the same cloud the whole time. Instead, the difference is because I changed my direction.
This is also why I’ve tried in the past to emphasize the importance of looking around, including behind yourself, while you’re doing landscape photography. The light at any given moment could be completely different as you look 360 degrees around.
Personally, I find it’s especially important to keep direction in mind when I’m doing forest photography. Facing one way, the forest could be a chaotic scene with shadows going everywhere:
But pointing in another direction can change that. Personally, I always try to see if there are good compositions pointing toward the sun, since backlighting tends to simplify chaotic scenes:

The last thing I’ll mention has to do with camera equipment – specifically your lens. The longer your focal length, the more easily you can isolate individual spots in the landscape with different qualities of light. A wide angle can reduce your options a bit by comparison. Wide angles are still great for landscape photography, but if you happen to be using a telephoto, it’s a nice bonus to have more flexibility with your quality of light.
Conclusion
If there’s one thing to take away from this article, this is it: Even in landscape photography, you have the power to change the light to match the mood of your photo. It takes some creativity, but the tools of timing and direction are there to help. Hopefully this article gave you some good ideas of how to use them for your own landscape photography.
[ad_2]
Source link


")


